Once you’ve invested in a vaping kit, it’s worth investing the time to clean it; for two reasons:
- Cleaning your vape kit will prolong the life of your e-cigarette and help it perform consistently better.
- A clean vape kits give you more satisfaction.
Let’s dive straight in.
Atomiser
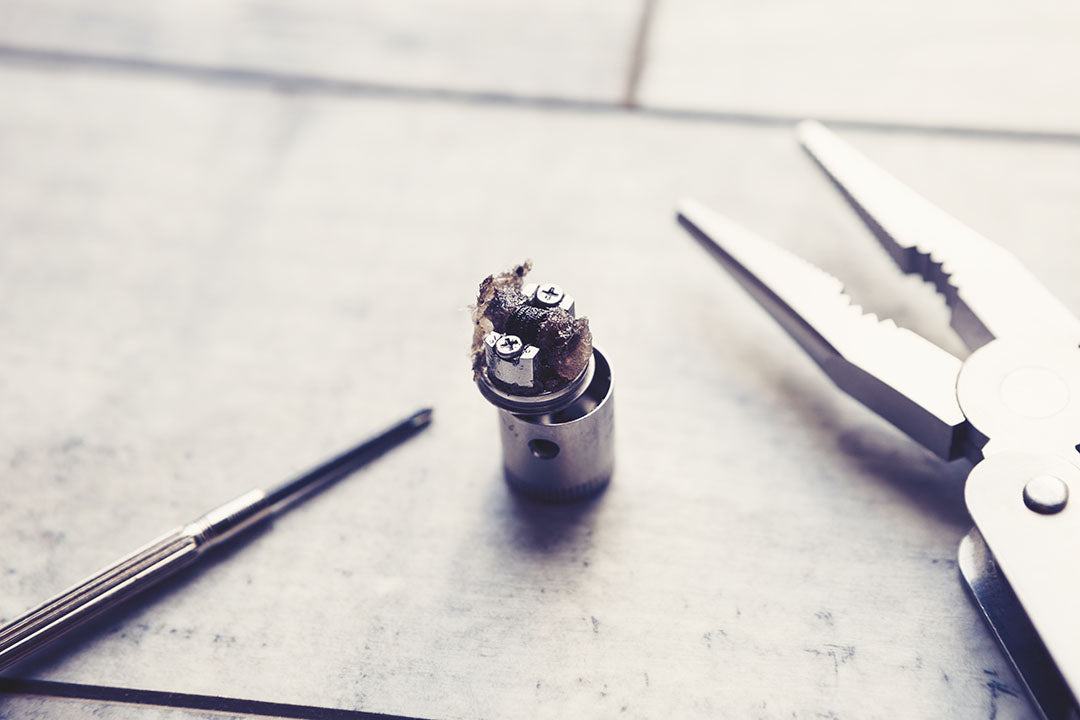
First up is cleaning the atomiser, arguably the most important piece of vaping apparatus that requires a good scrub. Cleaning the atomiser prevents flavours from mingling and causing the chamber to go stale. A build up of liquid residue in the atomiser blocks airflow and limits the capacity of the coil.
For the best vaping experience, we recommend cleaning the atomiser at least once a week, or sooner if you experience a burnt taste. The more you vape, the more often you will need to clean you vaporiser.
There are several methods of doing this, but not all of them are effective, so we’re just naming the best two options:
The premium option is a 30-minute soak in a small bowl of isopropyl alcohol solution
You can also burn off waxy leftovers during a vaping session by prolonging the hold on the coil each time you take a hit. This is super simple method to prevent waxy deposits from forming.
To clean the atomiser remove the tank from the device and discard any e-liquid leftovers. Twist the coil to the left and unscrew it from the tank.
Vape Tank
We also recommend cleaning your vape tank at least once a week as well. Regular cleaning maintains wholesome flavours, boosts the performance of your vaping kit and prevents bacteria that can cause mouth infections.
Again there are two ways to give the vaping tanks a good clean; rinsing them with water or dowsing them in alcohol solution. If you’re giving your atomiser a wipe-down with alcohol, do the same with your vape tank.
- Detach the tank and run it under a tap to wash out any remaining e-liquid. Then completely disassemble the tank and dry it off with a paper towel.
- Take a soft cloth or paper towel and dab a bit of high-proof alcohol on it.
- Scrub down any areas that have a build up of gunk.
- Wipe down with a piece of dry cloth and rinse under warm water.
- Let the tank stand for 10-15 minutes then put your kit back together
Batteries
You may not think to clean your batteries, but this is actually an important part of maintaining your vaping kit. If you neglect the battery it will clog with debris and hamper the connection to the tank thus effecting the performance of your e-cigarette.
*Note: Take extra care when cleaning the battery of your vaping vessel!
- The best way to clean your battery is to continue with the alcohol solution, but use a cotton swab to daub around the battery connection.
- Take a thumb tack and gently insert it into the air holes in the threading
- Wipe the metal areas down with a soft tissue and let the battery dry completely before reassembling your kit
Cleaning your vaping kit takes very little effort, and is worth doing to maintain the performance and quality of your e-cigarette experience. For more information on this and other vaping topics visit our vape shop online or contact us